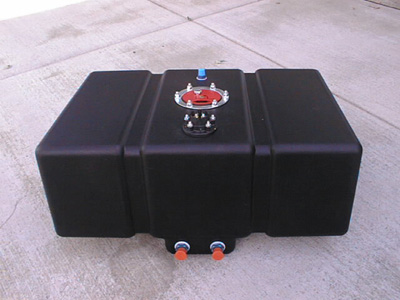
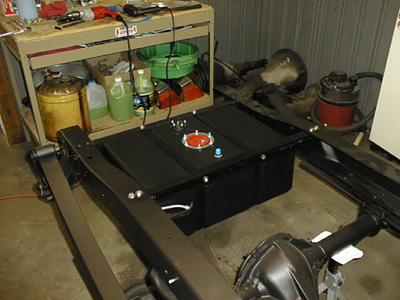
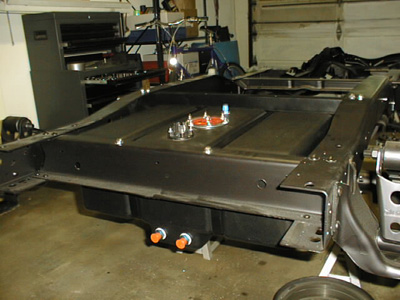
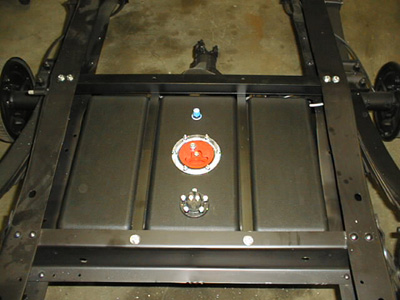
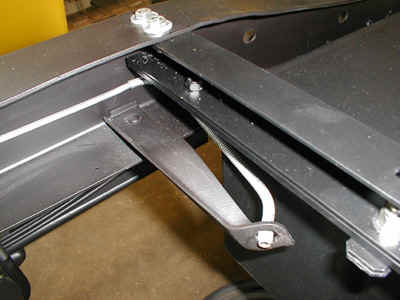
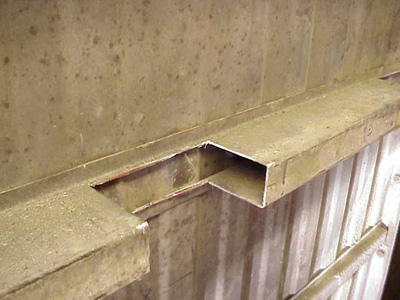
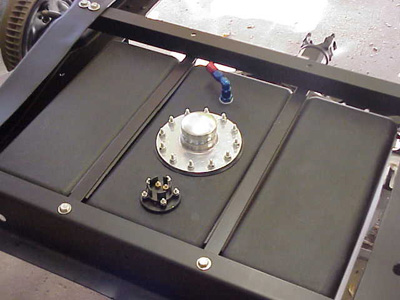
Step by step instructions on how to install a fuel cell between the rear frame rails under the bed. I decided I did not want to run the saddle tank gas tank that was mounted on the outside right frame rails, but instead I wanted to put a fuel cell in the rear frame rails under the bed floor. I have seen people put in suburban/blazer gas tanks back there, and while there is nothing wrong with this I liked the looks and simplicity of the cell more. After some careful measuring I determined a 16 gallon unit (same size as my stock tank) from Summit Racing would fit perfectly. This is a foam filled cell (to prevent fuel slosh) that has a GM sending unit already installed. The cell will be mounted to the top of the rear frame support and to the top of the frame just behind the differential with a custom made bracket. Because the frame kicks up above the axle, I needed to design a bracket that drops down, that way the cell will sit level with the bed/frame once finished. The difference from the rear of the frame to where the new bracket was going to sit was 1 ¾”. I went to Discount Steel and Aluminum (Mpls, MN) and purchased an aluminum C-channel that measured 32” long and 1 ½” x 1 ½”, I then purchased a flat piece of aluminum that was also 32” long and 1 ½” wide by ¼” thick. Once home I put them together in a vice, drilled two holes (one on each end) and bolted them together, this giving me the desired 1 ¾” drop bracket. Once two pieces were now one, I drilled the remaining holes for the straps, sanded the bracket, and primed and painted it the same color as the frame. Once the paint had dried I centered and clamped the bracket to the frame and drilled two holes through each end and bolted the bracket to frame. Now it was time to install the cell, or so I thought. The problem I encountered was that the bracket for the rear brake line was in the way, the cell with its brackets installed would not clear it. To remedy this I shortened the ends on one side of the brackets (the ones that bolt to the rear frame support) by one inch, by doing this it moved the cell back the same distance and now it fits like a glove with about ¼” clearance between the cell and the brake line/bracket. Now before you think you are finished and attempt to install the bed back on the frame, you will need to cut a five inch section out of the bed support that runs directly above the fuel cell sending unit (if your truck has a fleetside bed). This modification is required in order the clear the sender on top of the fuel cell. On my truck, I decided to fabricate a C-channel to weld into the opening...giving the underside of the bed a much cleaner look. Finally, you will also need to figure out where you want to locate your gas filler neck...mine will be in the bed floor (see pics below).
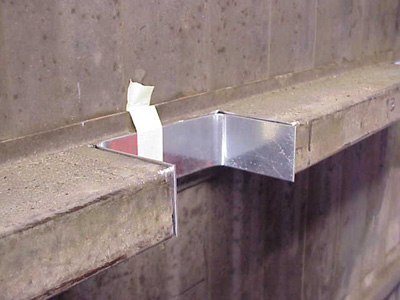
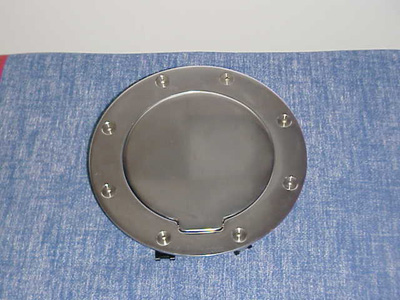
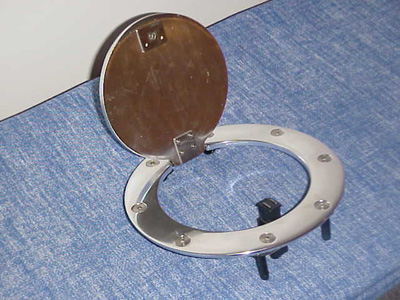
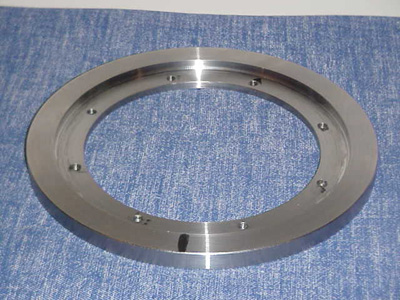
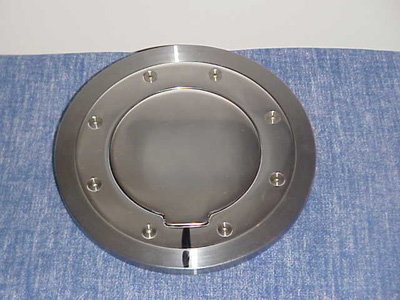
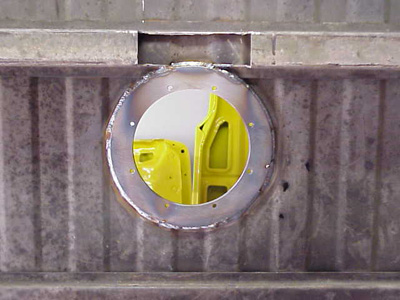
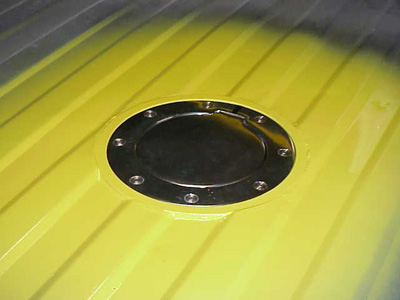
Because I didn't just want to cut a hole in the bed floor for access to the fuel cell, I decided to install a fuel door into the bed floor. While this sounds easy enough, it really wasn't. Because fleetside bed floors are ribbed, I needed to figure out a way to get the fuel door to sit flush and not look like a Saturday afternoon hack job. To remedy this, I decided the best method would be to fabricate a mounting bracket/ring that I could set flush with the highest rib on the floor and weld in. This bracket/ring also had to allow me to set the fuel door flush with the top of it, so neither the bracket/ring or fuel door would sit above the bed floor. Luckily, I had a friend who owns his own fabrication shop and had him fabricate this bracket/ring out of 1/2" thick cold rolled steel. The finished bracket/ring is 1/2" thick, with a 1/4" recess to allow the fuel door to sit flush inside of it.
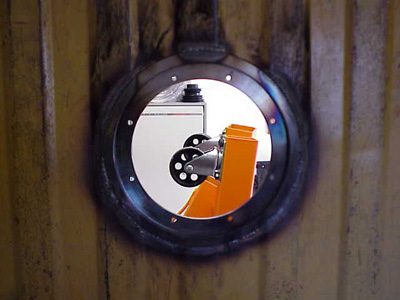
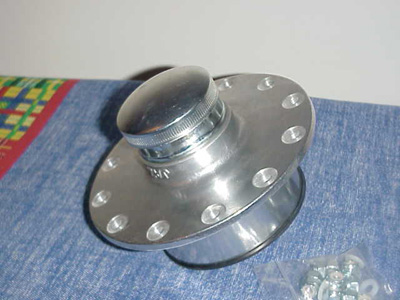
While I was working out the details with the fuel door, I decided I wanted to put in a better fuel cap on the fuel cell. While I doubt the original cap assembly would have given me any problems, I wanted the filler neck to sit a little closer to the bed floor, and have something that would keep any water, dirt, or debris that might be able to find its way into the fuel cell. The filler neck I purchased was a JAZ Products Fast Fill valve with cap. In order to get this assembly to fit my fuel cell, I needed to remove the original cap assembly, widen the opening on the fuel cell by 1/8" or so, then mark and drill the new holes for the new JAZ assembly. All in all it was an easy upgrade and well worth it in my opinion.
Here is a list of the key components and their part numbers for everything I did on this project...
-Fuel Cell, Summit, SUM-290108
|