After installing my electric cooling fans whenever they would come on my idle rpm would drop because of the high amperage the fans used. I hooked up the AC idle compensator on my carb so when they kicked in it would raise my idle a little. This worked fine but after a while I noticed a company named Powermaster who made alternators which were chrome. I thought chrome would be cool so I decided to buy the 140 amp one wire model. The part number is 37293. I bought mine at Summit. Below is what is involved to hook it up. Removal of the old stuff: First thing we need to do is remove the old alternator
and any wiring that will not be used with the new installation. Removing the
alternator is straight forward of course. The one wire alternator only needs well,
one wire. This wire needs to go from the BAT terminal on the alternator to the
positive battery post. That's it. More on this later. The wiring on my
truck, which I think will be close to the same on most of our trucks, has a three wire
hookup. Two wires are in the spade connector and one on the BAT terminal. The
red wire on the spade connector goes to the hot post on the starter. The black wire
goes to the ignition switch and is what normally energizes the alternator. The red
wire on the BAT terminal goes to the junction block on the firewall beside the master
cylinder. From there it is spliced into another red wire which goes back to the
starter hot post. What I did was cut the red wire at the junction block which came
from the BAT terminal, leaving the other red wire going back to the starter. I also
cut the switch wire which came from the spade connector at the alternator as close as I
could to the firewall. I removed the red wire from the starter hot post which is
coming from the spade connector. Now all I have left on the starter is the red wire
coming from the junction block and the small switch wire (which is what energizes the
starter). Of course the positive battery cable is on starter also. This is the
worst part of the install. All these wires are behind the engine and taped
together. You wouldn't really have to remove them like I did, but I like to keep
things as neat and clean as possible. You could cut them at a point to where they
will not be seen and tape the ends to keep them from getting wet I guess. I wanted
mine cut as close to the firewall as possible. So now, after this wiring mess is
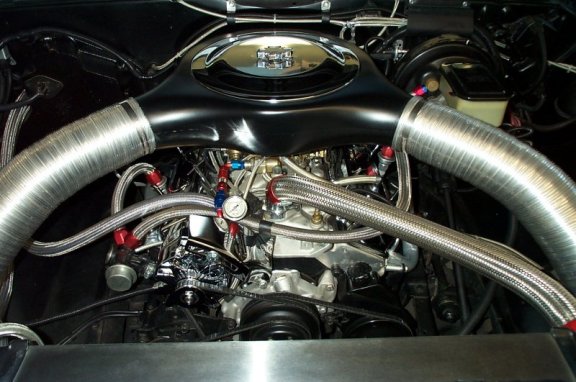
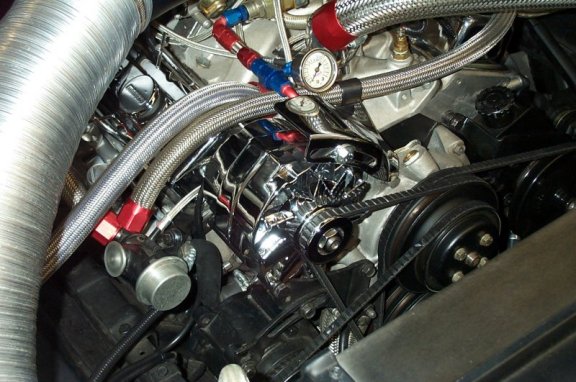
straightened out, let's get to the install. Installing new alternator: Go ahead and mount the new alternator. You can also put on the belt and tighten it up. For the wiring, Powermaster says it needs a minimum 6 AWG stranded wire. I finally found what I used at a local auto parts store. It is a 6 gauge battery cable, like what is used for lawnmowers. I also picked up some copper ring terminals while there. The terminals I used are made for battery cable ends I think. You will need two, one for the BAT terminal and one for the positive battery post. The ones I used were crimp on style. I used a bench vise to crimp mine. I recommend taping or using some shrink tubing on the them after crimped. That's all there is to it. As a reminder, the Powermaster one wire alternators have to turn to 1200 rpm to switch on. This isn't a problem because your truck will do this when it starts anyway. Below is the way it ends up looking after it's installed
|