Written by: Mike Wheelock
My truck is a 1983 Chevy, but this "how to"
should apply to all 1981 to 1987 Chevrolet and GMC trucks. In this "how
to" I only replaced the cab bushings. I did not even loosen the bolts
at the radiator support bushings. I actually consulted an auto body
shop before I attempted this and followed their instructions. They told
me the radiator supports did not need to be loosened as long as the
proper jack placement was used. Click on any image to view a larger
version.
Step One -
Round Up Your Parts & Tools:
Before you start a project like this, you need to round up all the
parts and tools you will need. It is never fun to have to hunt down
parts after you have already started, especially if you have to order
them and wait.
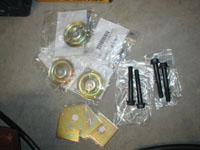 |
I highly recommend getting new bolts at a minimum. If yours
are anything like mine, they will need replacement. I got four
new bolts from
LMC Truck (part no. 30-0277). All four bolts are the same length, but the
bolts at the radiator support (not changed here) are different.
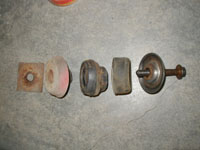
I also got four new lower washers from GM (part no. 14027472).
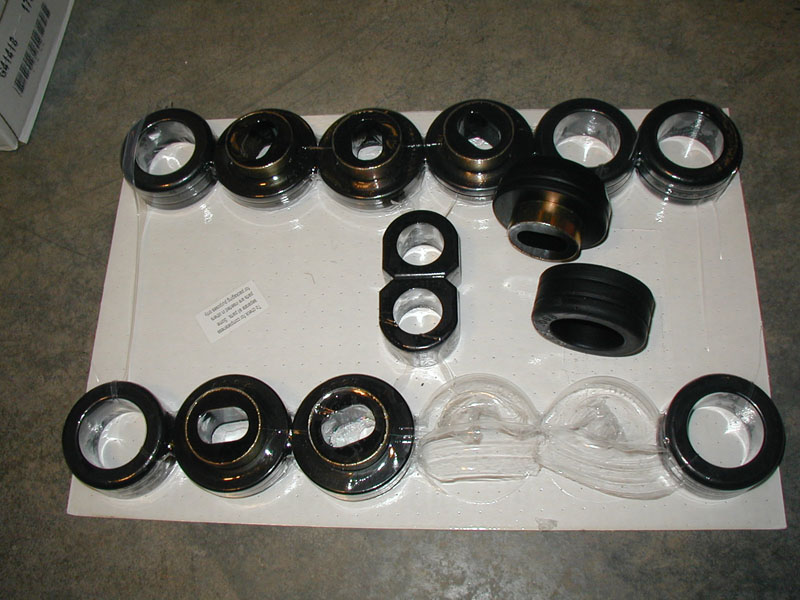
Also shown to the left are four new shims from
LMC Truck (part no.
30-2830) which I did not end up using because they were made in
Taiwan. I instead cleaned up and re-used the existing shims. I
tried to get new upper cups from GM, but they are not
available. You will have to clean up and re-use those as well. |
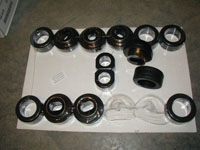 |
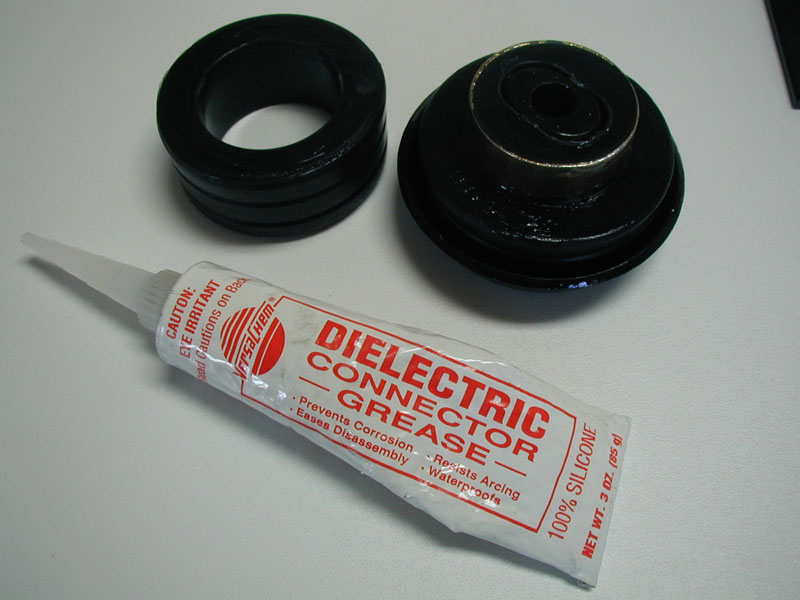
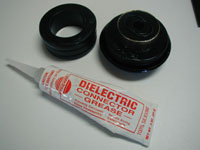
I bought the entire
Energy Suspension
Hyperflex bushing kit for my truck. I bought black because they
look stock. Shown to the right are the new cab bushings and
sway bar bushings. I purchased my kit from
Summit Racing. |
Other items to round
up:
- Penetrating oil (WD-40)
- Long handled breaker bar with 3/4" socket & 10" extension
- 1/2" impact wrench with 3/4" socket & 10" extension
- 1/2"-13 UNC tap
- Tube of anti-seize compound
- 100% silicon grease
- Torque wrench capable of 55 foot pounds
- Safety glasses
- Por15, Metal Prep, rubber gloves and brushes
Step Two - Loosen Your Cab
Bolts:
For this step you will need the penetrating oil. If you spray it in
between the cab and the upper cup, it will get into where it needs to.
Loosening these bolts is perhaps the toughest part of this whole job.
At least if yours were like mine.
Important: You will want to remove the bolts on one side
only, and just loosen the bolts on the other side. This helps keep the
cab from shifting while you are replacing the bushings.
Keep in mind that you don't want to break these bolts off. If you
do, you will have to take the carpeting out of the cab and cut a hole in
the floor the get the captive nut out and replace it with a new one.
Use lots of penetrating oil and a fair dose of patience. Let them soak
overnight if you have to. It sure beats having to fix a broken bolt.
I used the breaker bar with a cheater pipe on it to do the initial
loosening. After they broke loose, I used the impact wrench. A couple
of times, the impact wrench stopped turning the bolts and I had to get
out the breaker bar again to get past the "tough" spots. The impact
wrench definitely made this job easier.
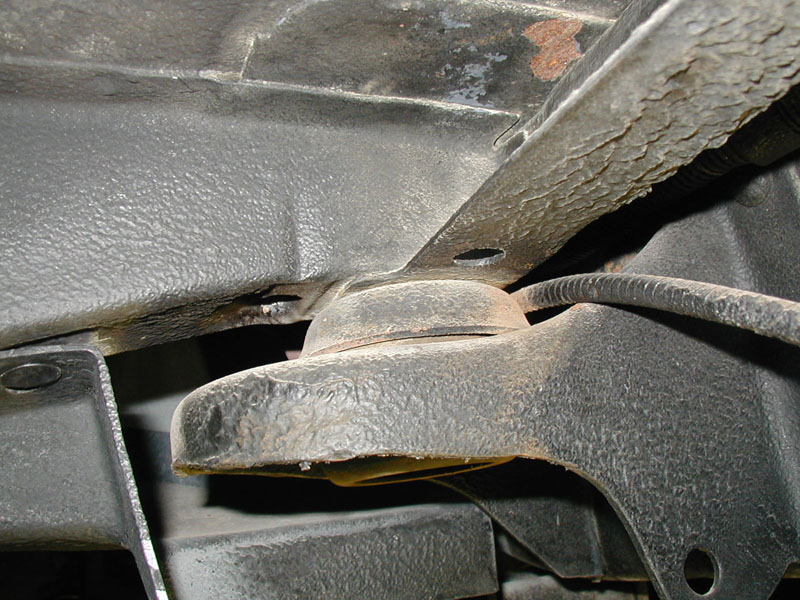
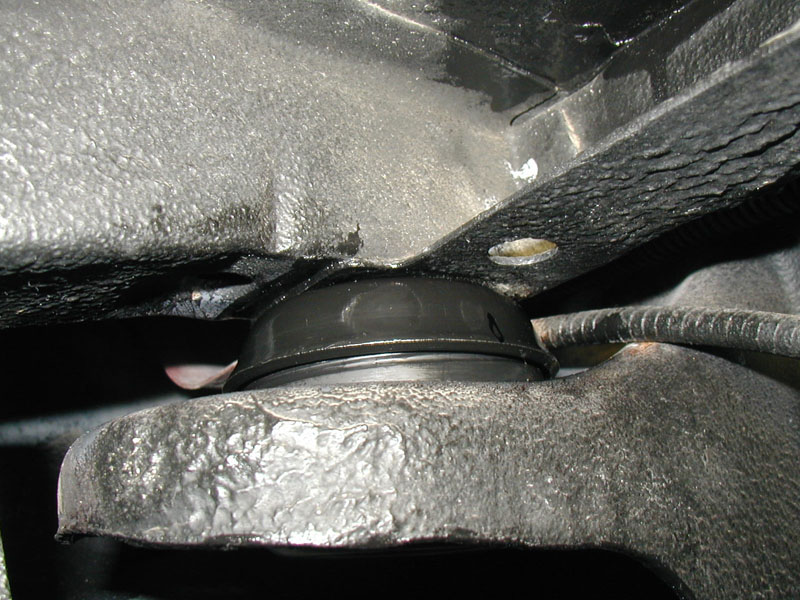
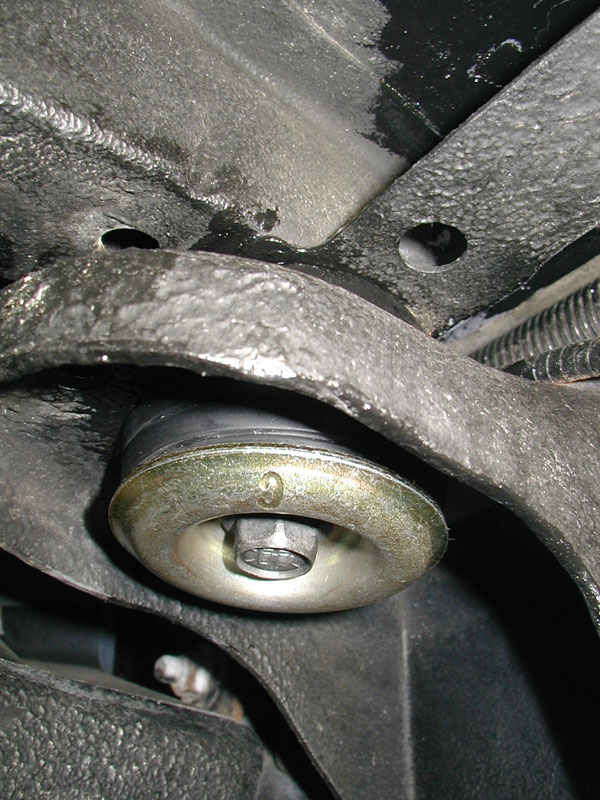
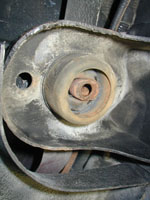
 |
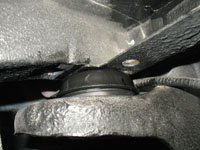
Location of front Cab Bushing. Driver's side is shown.
These are really easy to get to. |
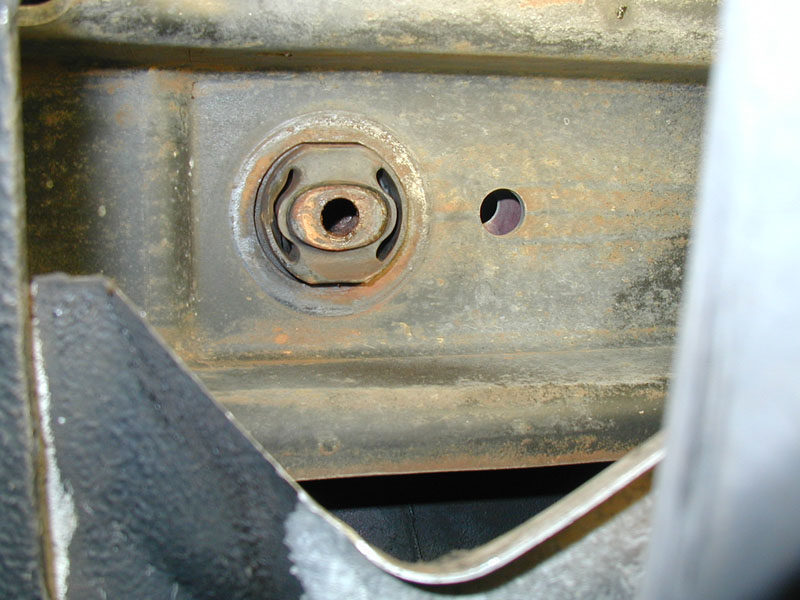
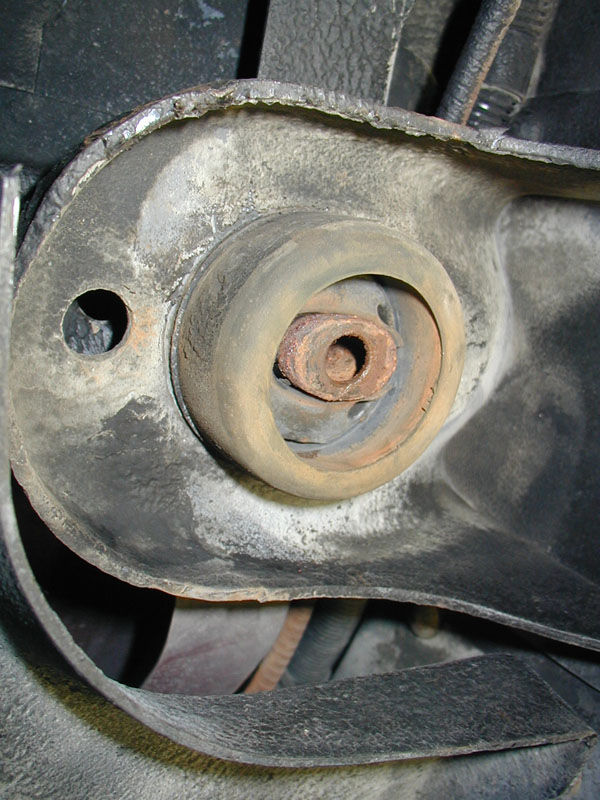
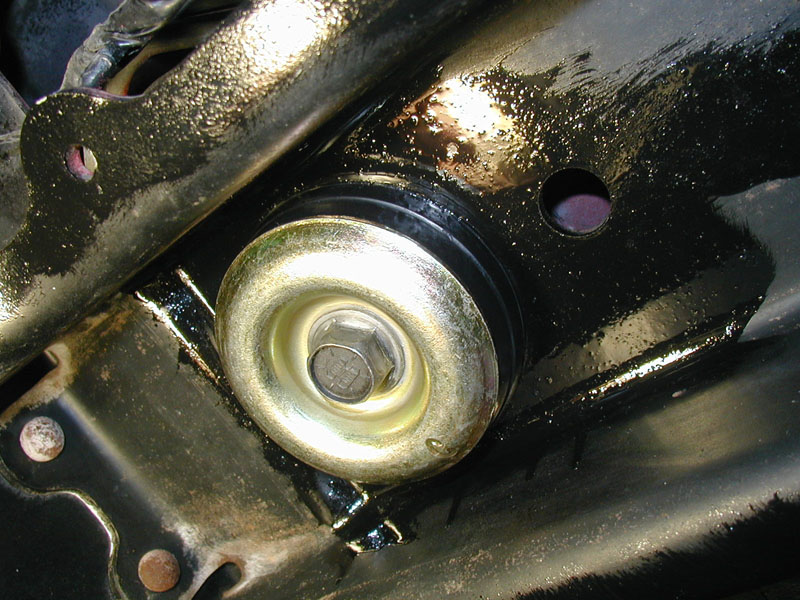
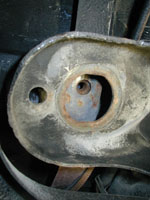
 |
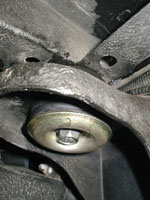
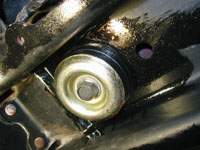
Location of rear cab bushing, shown here with bolt, washer
and lower bushing removed. The rear bushings are a little
tougher to get to and require using an extension on your breaker
bar to reach up in there. |
Step Three - Raise Your Cab:
After you get the bolts loose on one side and removed on the other
side, you will want to raise the side with the bolts removed. The
method I came up with worked really well. I have a floor jack and a
bottle jack, but the jack under the hood worked perfect. Proper
placement of the jack is critical to avoid damaging any sheet metal, so
pay attention to how it is placed. Here's how I did it.
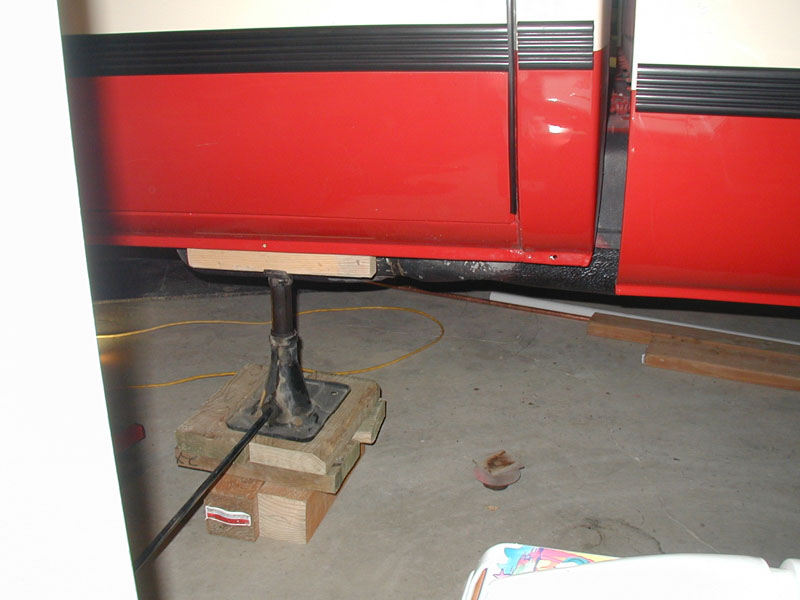
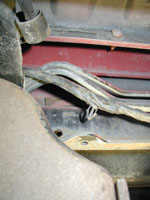
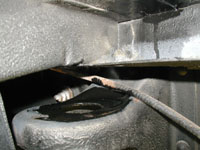
 |
In this picture, you are looking at the driver's side door.
You can see the joint between the cab and the bed on the right
side. Notice where I positioned the jack. You don't want to
position the jack too far back or too far forward or you might
kink the sheet metal between the fender and cab. Notice the 4x4
and 2x6 blocking I used. |
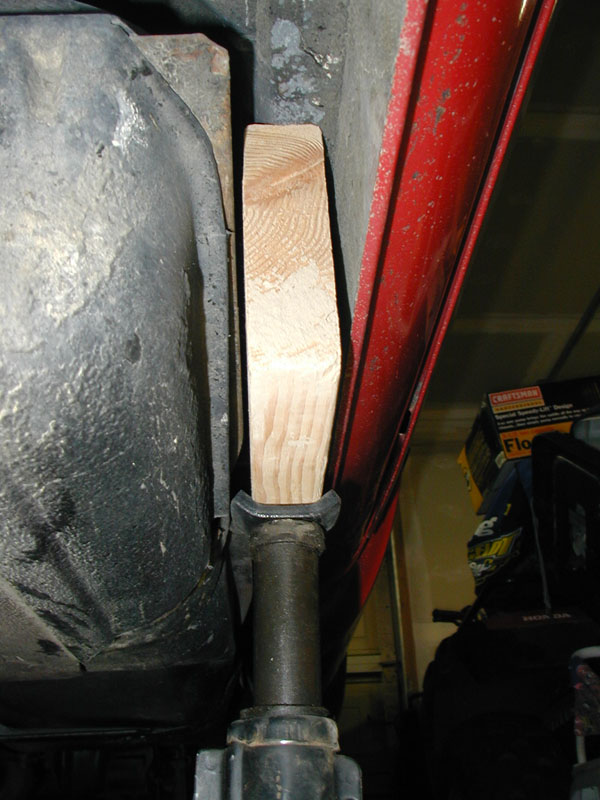
 |
This picture shows how I situated a piece of 2x6
on top of the jack and used it to spread the load out across
this strong section of the cab. The gas tank and outside
section of the cab pin the 2x6 in nicely so it can't shift.
Also notice how the bent up ears on the jack hold the bottom of
the 2x6 from shifting. |
 |
This picture shows how much I had to raise the cab to get
the front bushing out. The rear bushing will come out at about
half of this height, but you need to raise it this far to get
out the front bushing. |
 |
The only thing that happened while raising the
cab was this clip on the wiring near the back of the cab pulled
out of the hole. No big deal. |
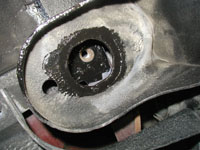
A Side Note:
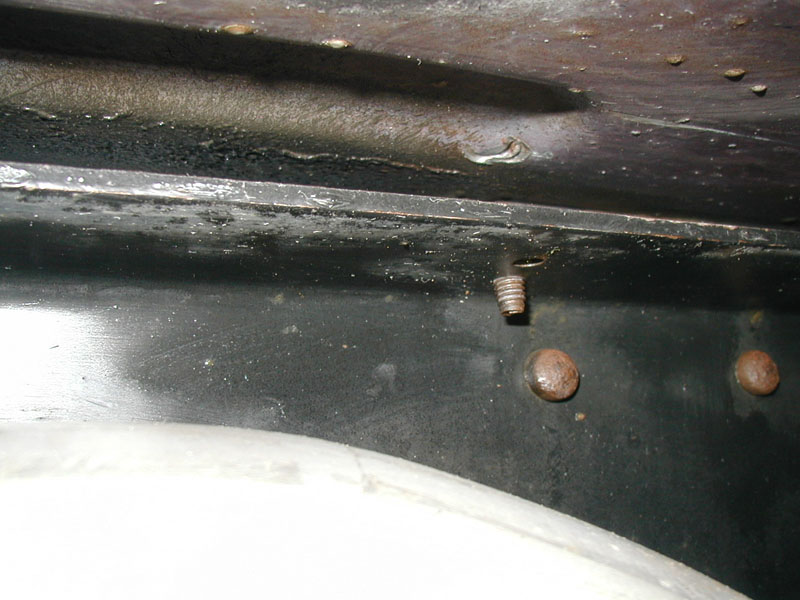
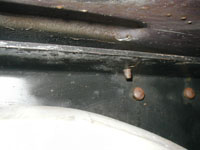 |
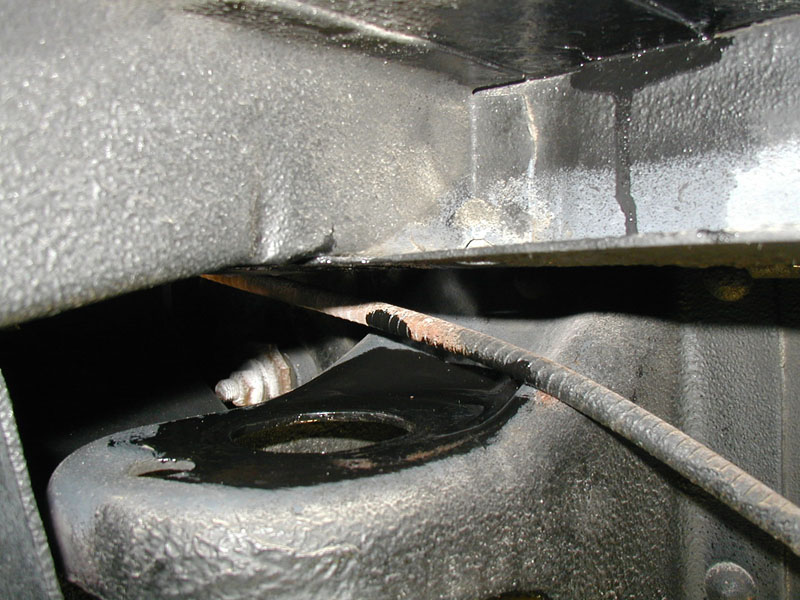
Once I had the cab raised, I could plainly see what was
causing the "popping" noise I would hear when backing out of my
driveway over the curb. The head of this bolt going down
through the top of the frame was rubbing on the cab. You can
see the indentation of the head in the sheet metal. Replacing
the cab bushings solved this problem. |
Step Four - Remove Your Old
Bushings:
 |
Once you have the cab raised enough, you have to push the
upper "cup" up through the hole and slide it with the upper
bushing out sideways between the cab and the bushing mount.
These photos show the front, but the rear works the same. In
the photo to the left, the lower bushing had to be pried loose
with a screwdriver. Apparently undercoating had glued it in
place. |
 |
 |
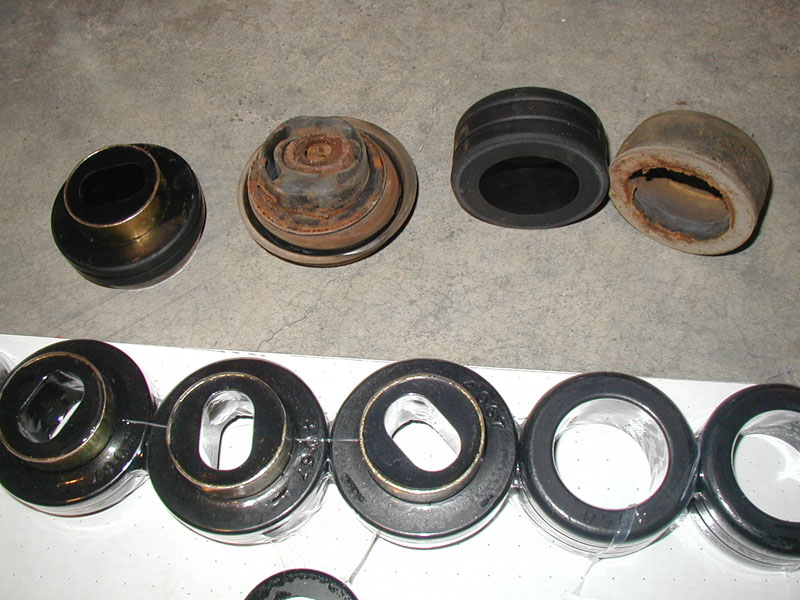
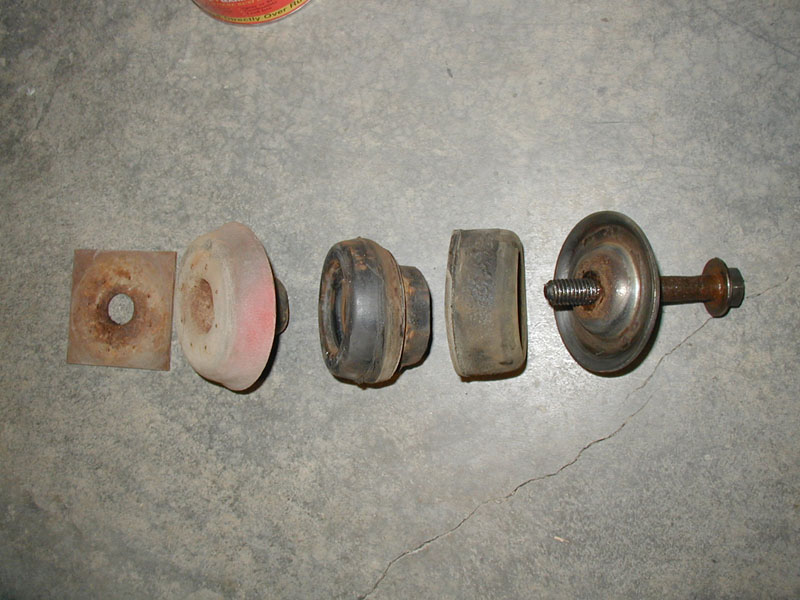
Here you can see the old bushings and hardware. Note how
crushed the old upper bushing was. You can see the shiny spot
on the upper cup where it was contacting the mount on the frame. |
 |
Step Five - Prepare to Install Your
New Bushings:
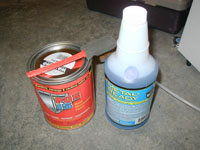 |
POR15 is a great
product. It dries hard like a rock, but is flexible and won't
chip. It also neutralizes rust on contact. It is shown here
with "Metal Ready" which you spray onto the surfaces to be
painted. I found that using the disposable foam brushes like
the one in the picture worked quite well. This stuff is nasty,
so wear rubber gloves when you use it. If you get it on your
skin, only time will get it off. It takes one to two weeks for
it to "wear" off. |
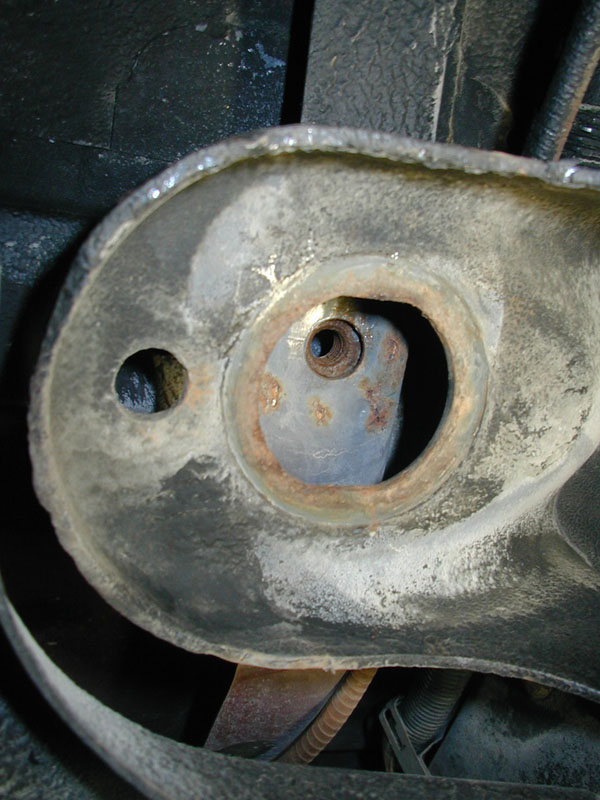
 |
Apply POR15 to rusted or bare metal areas according to the
instructions. You will have to let this dry overnight. Also,
run a 1/2"-13 UNC tap up through the captive nuts and blow them
out with compressed air. Notice how shiny the threads are after
this. This also makes threading the new bolts in a cinch. You
can do it with your fingers. |
 |
 |
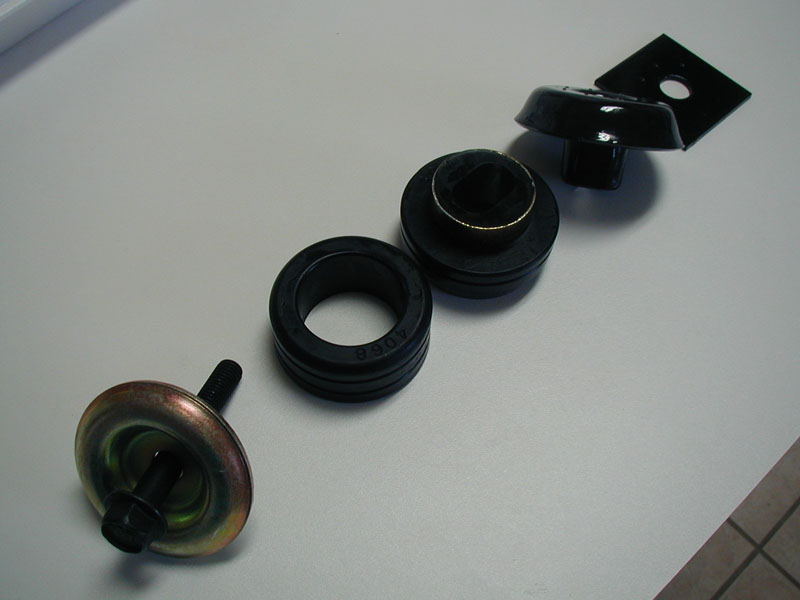
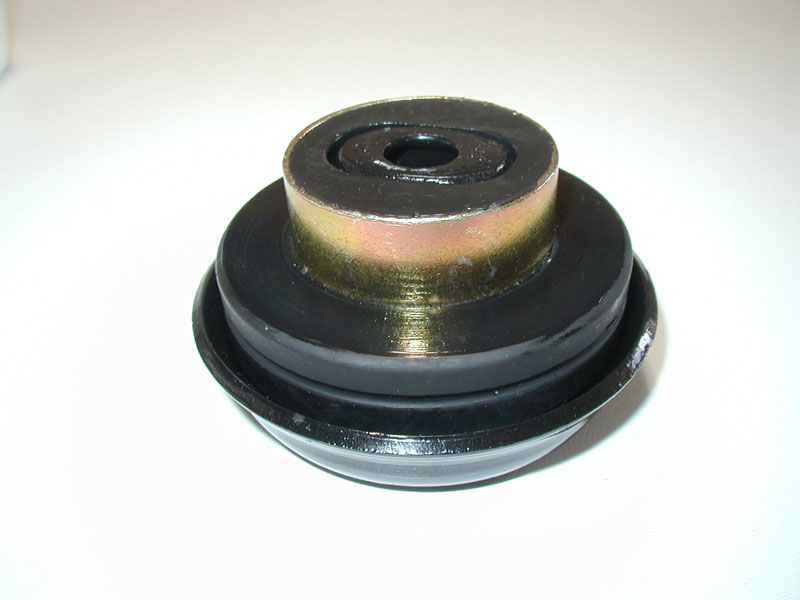
I had the old upper cups and shims sandblasted before
painting them with
POR15.
You can see them here with the new bushings, bolt and lower
washer. Note the assembly order shown. Not all of my bushings
used the square shims, so take note of which ones do and replace
them like you removed them. The shims fit directly against the
cab floor. |
 |
To help prevent squeaking, liberally apply 100% silicon
grease to all surfaces that will contact metal. Apply it to the
inside of the upper cup also before inserting the new bushing as
shown to the right. |
 |
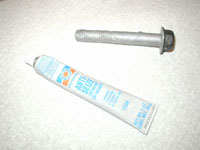 |
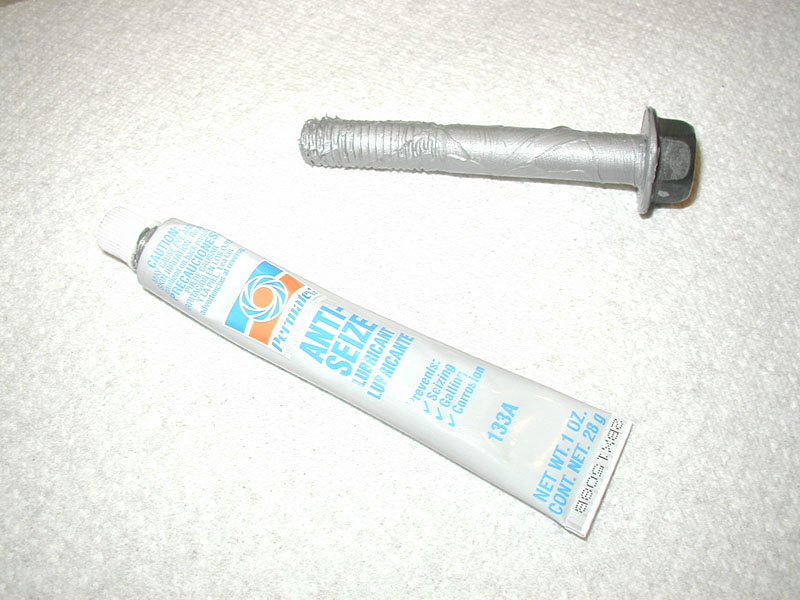
I would highly recommend using brand new bolts. My old
bolts had rusted away on the shaft to the point where they were
unfit for service. You should liberally apply an anti-seize
compound similar to that shown to reduce rusting. Someone may
want to replace the bushings again someday. |
Step Six - Install Your New
Bushings:
 |
Take the two upper cups that you have greased and inserted
the upper bushings into as described above, and slide them in
between the cab and frame mounts. They should drop down through
the holes in the frame mounts. If you had a shim between the
cab and upper cup, slide it in as well. Now you want to lower
the cab a little, but not enough for the cab to rest on the
front upper cup. Now put a lower bushing in a washer, and put a
bolt through it. Now start the front bolt with your fingers.
You may need to slide the upper bushing and cup around a little
to find the hole. Once you have it started, lower the cab a
little more and do the same thing to the rear mount. Once the
rear bolt is started, you can let the cab down all the way and
remove the jack. |
 |
Now that the cab is lowered, tighten the bolts with your
fingers a little more, but leave some slack. Now move your jack
to the other side, remove those old bolts, and repeat this
process from step three. Finished already? Now you need to
torque all four bolts to 55 foot pounds. Now that wasn't so bad
was it? |
 |
Congratulations!
Congratulations, you are now riding on new cab bushings. This
changed my ride quality a little, but most of all it cut out a lot of
road noise and vibration. My old bushings had collapsed so badly that
the metal cups were riding on the frame mounts. I also had that bolt
that you saw above digging into the sheet metal of my cab floor. There
is clearance there now and that annoying "pop" or "creak" has
disappeared.
Home
|